Tuesday, July 24, 2012

T shirt printing

Today I did a project that I have been meaning to do for ages - ever since I printed black fabric with white emulsion for my applique birds piece.

First I messed around printing objects in black on white paper. I used pen tops, screw heads, erasers, beads - anything I could find. I settled on a linear design - the picture on the right is a photo of the printing on white paper reversed in Picasa to check it would look ok in white on black as the T shirt I had bought to print on was a dark grey marl.
This is the finished result. I used white fabric paint tipped onto a folded piece of damp kitchen towel in a dish as my 'ink pad'. After doing the linear design I branched out into these stars - the smallest dots are made by dipping a blunt pencil into the paint.
And here is the back - probably neater than the front as I had got my eye by now!

On the T shirt are all the things I used to print with - I love printing! I intend to wear this T shirt to the gym.

And also this week I have got round to joining Pinterest - a visual pin board for everything on the web that you want to keep as inspiration - see here.

Wednesday, July 11, 2012

Seaweed Pressing Workshop

Today I went to a workshop to learn how to press seaweed. What fun! It turns out that it is just like pressing flowers except that you press it wet. The tutor showed us a 'Seaweed Diary' that she had made - a page for each month, showing how the varieties change throughout the year.

We started by donning wellies and going down onto the beach at Lepe Country Park to collect seaweed in a margarine tub. We were advised not to pick anything too fleshy, like Bladderwrack, as it would just go mouldy in the press.
When we got back to the classroom we were given a shallow tray with a piece of plastic mesh over the top. I reckon you could use any plastic tray and something like a cake rack as all it was doing was supporting the paper and letting the water drip into the tray.

We squirted sea water onto thick quality (300gsm) watercolour paper and then placed our seaweed sample on. We used thin knitting needles, the kind you use to knit socks, to spread out all the fronds into a natural looking arrangement.

This was super-fiddly and required a lot of patience - right up my street! I love the way they look and was so pleased to learn how to do this.

The tutor said that you can fiddle about with the seaweed out of water for up to an hour and then it will start degrading.

This was my first sheet of samples - a bit of a red theme going on.
Then I did this page. The green frondy one at 4 o'clock took ages and I fear that the red spidery one at 6 o'clock might disintegrate in the press - we were warned that this can happen if they are too delicate.

You can use a pipette of water to help float the fronds out into a nice arrangement but you have to tip all the water off the page at the end before it goes into the press, so it can all float back again!

The paper at the back is the paper that your samples will be on forever so we tried not to get it dirty and to position our samples carefully.

Finally into the press. This is just like a flower press but bigger. She put blotting paper between each page of seaweed and will put more on top at the end.

It takes 6 weeks to dry out in the press so I have to go back then to pick up my pages and see if they still look as good when dried.

Below are a few of the beautiful dried and framed specimens she brought in to show us. These were quite big and must have taken ages to do.

Finally, a bit of Olympic textiles. This is an installation at the Great Hall in Winchester made by children inspired by the Olympic Rings. It is mostly wool wrapped rings fastened onto mesh. It is very colourful but most impressive is the scale - 3 big panels like this.

Week 33 - Final Exhibition

Last week's blog post showed the work of the students on my course at the exhibition as we were setting it up.
The exhibition all went off really well and seemed well attended when I was on duty to steward, despite the awful weather. I got lots of complements for my 'Pylon Sky' piece particularly.
I finally got a chance to go round the exhibition as a visitor and these are the pieces that especially caught my eye.
Right - a small embroidery from City and Guilds Level 3 Embroidery.
A 3D hand-stitch bowl from City and Guilds Level 3 Embroidery. This was one of 3 bowls for this student's final piece. They were made out of tissue paper and stitched in various ways. It was very beautiful how they caught the light on the windowsill.
Below is my favourite quilt from the City and Guilds Level 3 Patchwork and Quilting room. It is obviously inspired by Southampton Docks and all the shipping containers have a raised ribbed surface.
Below is my favourite piece from the final year degree students on the FdA Stitched Textiles course. It is about being alone in a public space and you can't see too well on the photo but there are dozens of figures stitched into the background.

Below is another final year piece - a cape about the public protests held this year - each side was different but all very well done.

This is another final year piece - very different as it is knitted, which is unusual in a piece of art. To go with this, the student had also created and had printed her own graphic novel, which you can see here.

This was a favourite from the Year 1 & 2 room of the FdA. It depicts a galaxy and is made in 4 layers to build up to a stunning 3D piece.

Finally these 3 pieces were from the Contemporary Textiles Workshop students, who meet regularly to keep challenging themselves on stitched textiles pieces.
So the exhibition is over and the course is over - what will I do next? I will keep on posting about my creations but it might not be so regular, unless I do another course.


Saturday, July 7, 2012

Week 32 - Hanging Exhibition

It has been a very busy week. I finally finished off my written backup work for my machine-stitch piece - 'Pylon Sky'. The picture here shows the main inside spread and the front cover before it was attached to the front. I used the folding technique from on our Shape Books to make the pages into a more readable size.

Then on Monday we spent most of the day hanging and setting out our work for the exhibition. 


My 'Pylon Sky' piece was able to hang in a window, which showed it off to its best advantage.

My 'Wasteland' hand-stitch piece was on the wall next to the other pieces from our class.

This is Kim's work - hand-stitch at the top based on an abstract collage design she made and her fabulous machine-stitch piece based on her childhood in Singapore.

These are Jo's pieces - the top is her twinkling hand-stitched 'Galaxy' and the bottom is an incredibly neat hanging based on the ceiling of a palace in Spain.
This is Yvonne's work - an unusual hand-stitched decorative skirt panel, based on the design of some wrought iron gates, with shisha mirror embelishment and at the bottom is a beautifully personal machine-stitch piece about her mom who is Jamaican.

Finally, this is Jan's amazingly textured machine-stitched 'Cliff Face', using faux-chenille and manipulated fabric, and below her lovely hand-stitched cushion.


Finally, a bit of fun from my recent weekend away in Bruges. All these doors were in the town centre and I find them all so beautiful and interesting that I just had to take photos. There's a future craft project in here somewhere!


Wednesday, June 27, 2012

Week 31 - the final piece and prom dress

A bit late with my blog post this week as I have been working really hard to get everything finished. I have now completed 6 hours of fraying and finished my Pylon Sky machine-stitch piece. I am really pleased with it. I think it will look even better hanging up as I have metal rods to go through channels on the back to give it rigidity and weight. I just have to finish the written supporting information to go with it.

I am really excited because it will be possible to hang it in a window in the final exhibition next week.
My other project with a fast-approaching deadline has been to make my daughter's prom dress. This looks better on her than on this mannequin as she is really tall and so the style makes her legs look like they go on forever - it just touches the floor on her. Although this is a really simple pattern for a prom dress, it has been a real fiddle to make as the material she wanted was not wide enough to make the dress as per the pattern (meaning I had to piece the skirt to get the length) and the plunging front felt too exposed to her so I have had to alter the pattern to extend around the sides and put in a lace insert.


She is really pleased with the result - I hope it can stay clean and crease free until she actually gets to the prom next week - fingers crossed it is not raining.
Finally we went on the ferry to France at the weekend so I took the embroidery that I started earlier in the year to carry on with. I am pleased with how it is turning out. The silver birch stems in the background are stitched with variegated black and white embroidery thread so not every stitch shows up white - quite good effect I think.

The dark band across the middle is a piece of brown/black sari silk, with the frayed edges sticking out randomly. Finally the foreground is all in embroidery cotton - multiple colours in the needle to give random shading and variation.

The green at the front is gorse so lots of spiky texture to have a go at next!

Sunday, June 17, 2012

Week 30 - Assembling 'Pylon Sky'

Only a couple more weeks till the end of my college course so I have been trying to progress my machine-stitch piece, 'Pylon Sky'.

I completed the fourth panel on Friday and then started to assemble it onto a blue sheer backing fabric. Before I could do this I needed to sew a channel at the top to take a thin metal tube that will be used to hang it.

Positioning the panels was pretty fiddly - trying to line up the colours and the lines, as well as get it square on the fabric. The diagonal ribs have ended up being wider in the centre than on the original design, due to the inevitable distortion of the panels as they were stitched. (With Satin Stitch you put a lot of stitches into each row, which have to go somewhere so they make the fabric buckle).

When I was happy with the position of the panels I sewed them down by hand - I just couldn't face wrestling them through the sewing machine with the distortion and the slippiness of the fabrics working against me.

I then made patterns for the diagonal ribs and the central 'H' section. My plan was to cut them out of blue dress lining but from my sample I knew that this wouldn't be completely opaque and the ends of the Satin Stitch bands would show through when it was hung in the window. Therefore I had to bond the lining fabric to some thicker blue  fabric I had and then cut the ribs out of the whole sandwich. I also had to remove some of the straight stitches around each edge of the panels as in places they showed beyond the ribs. I had sewn these lines originally to act as a marker of the original design and also to catch the ends of the Satin Stitch bands and stop them fraying.

Once I had it all in place I secured the ribs to the piece by stabbing pins right through the ironing board and then bonding on with the iron through a piece of baking parchment - a hot iron and sheer fabrics don't mix well!

I left the centre till last. I had worked out that I could alter the original design by having the 'H' section go over the ribs to neaten them off and in turn tuck the arms of the 'H' under the ribs so that you didn't see them either. I am very pleased with how neatly this has turned out as I was quite worried about the complexity of this central bit.
So here is how it looks now - only got to fray the whole lot! I spent an hour doing the bottom right hand blue section to see how long it would take so I've got a few more hours to go! I have then got to decide how to attach the long edges of each panel to the backing (they are just pinned at the moment) and how to attach a thin rod that I have bought to stiffen and weigh down the bottom edge. I really love this piece though - I will probably be sad when it is finished.

Father's Day this weekend - as I have been busy on my embroidery I didn't have time to create something from scratch so I printed out a photo I took recently and backed it onto black card. It was taken by the river Avon at Stratford where a big flock of swans were fighting for lumps of bread that were being thrown for them.

Sunday, June 10, 2012

Week 29 - Progressing 'Pylon Sky'


Last week and this week I have been getting on with my machine-stitch piece. As you can see I have finished 3 of the 4 panels. I decided to make it in quarters as the whole piece is 80cm square and I think that has proved to be the right decision. As I am going to bond the main cross-ribs on afterwards I can hide the join underneath them. It does mean that I have had to cut out each quarter with reference to its neighbour so that the colours will look like they flow across the sky. I am going to fray them once I have finished all 4 so that I can ensure that I am fraying them in equal amounts and getting the subtle effects created by the cutting back and fraying flowing across the panels where necessary. I am really enjoying making this piece and I think it is going to look really strong when it is finished.

I have now finished mounting up my hand-stitch piece. I re-did the clouds in the sky with a thicker thread first. It is mounted on 2 layers of foam-core board topped with a layer of white felt.

On the back it is held in place by lacing it across with sewing thread. You do the long edges first and then the short edges, trimming off the excess fabric at the corners and then finally sewing down the corners. You can see the lines of dirt from handling the embroidery on the frame!
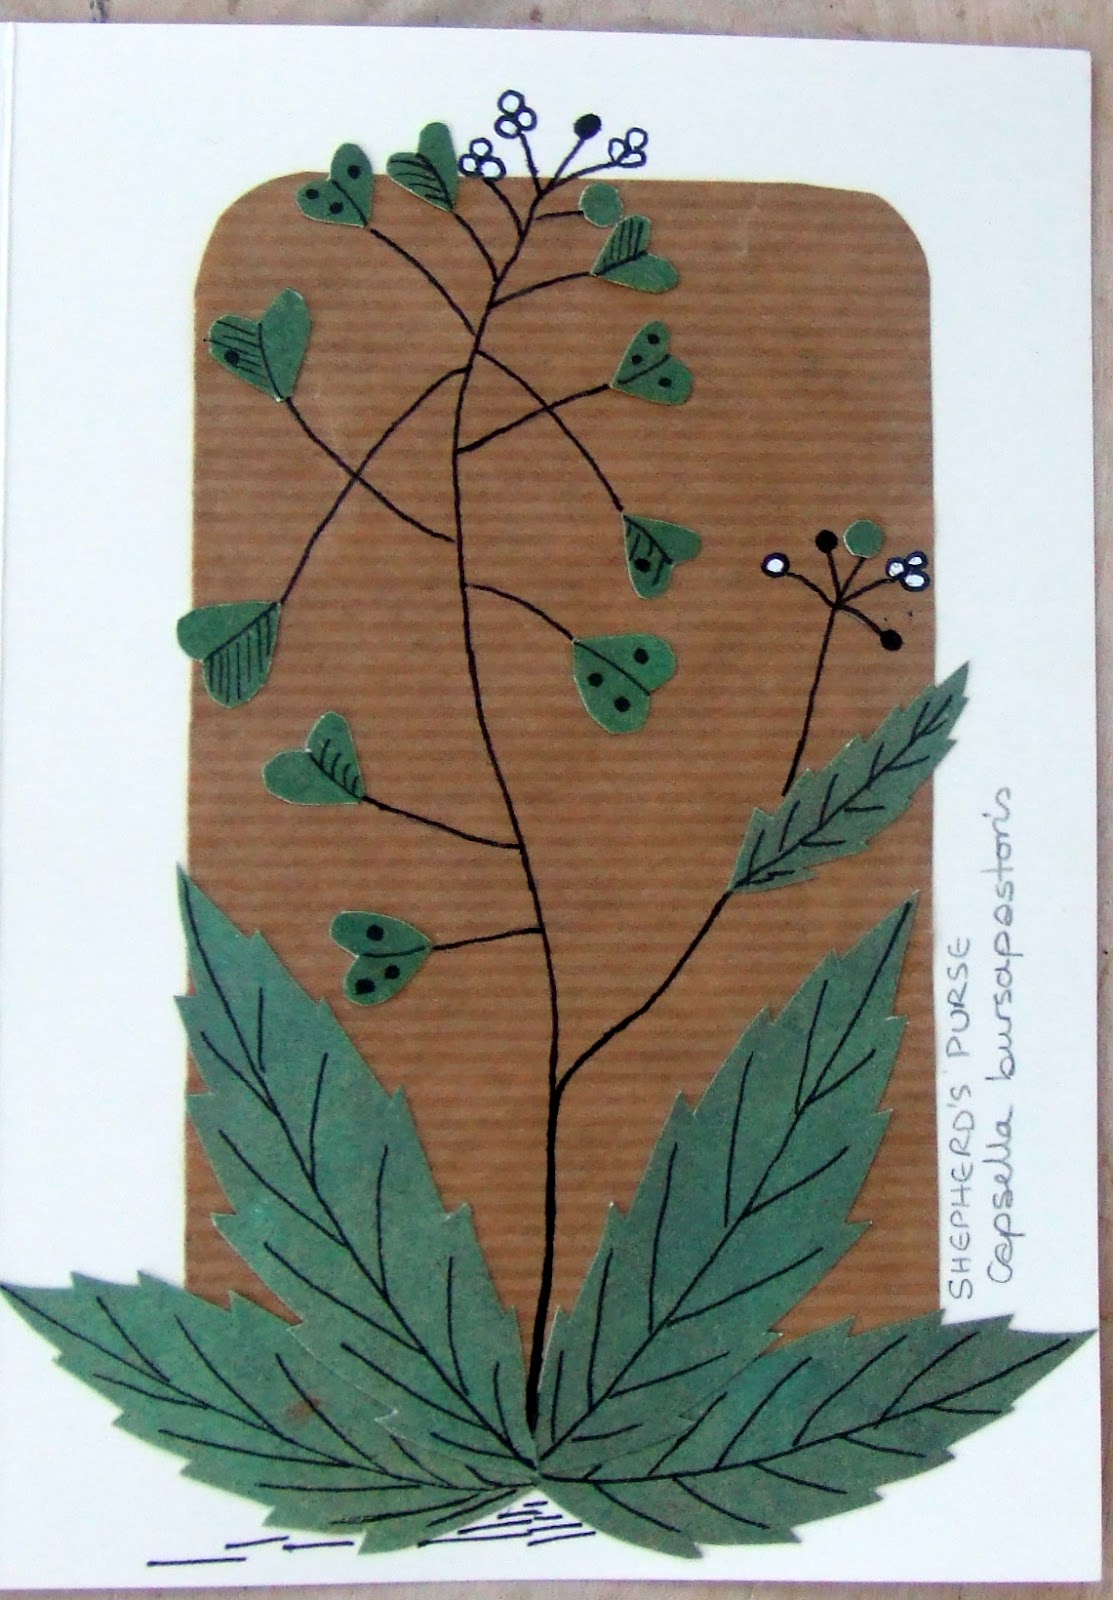
Finally, I had another family birthday card to make this week. I had some pieces left over from my original art work for 'Wasteland' so I used them to create a mini version of the Shepherd's Purse mounted onto a cream card blank, topped with a rectangle of brown paper.