Once I was happy with my composition I went over with a fine black marker so that I could put it on a light box and trace it through using a water soluble pen. I then put a piece of plain cotton on the back to act as additional stabiliser and hooped it up.
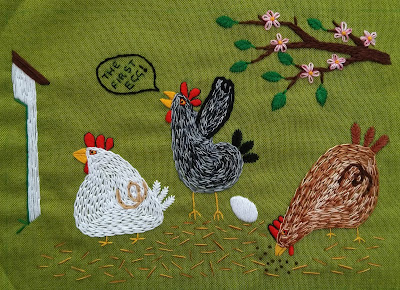
I used 3 strands of variegated brown floss (DMC) and outlined the shape with chain stitch before filling is it, effectively stitching round in a spiral to the middle. I was amazed how the pattern of the stitches really mattered in the final look of the 'feathers'.I then added the detailed features. I used a herringbone stitch for the tail feathers and satin stitch for the comb, wattle, beak and eye. I backstitched around the comb and eye to make them stand out and added a french knot for the centre of the eye. Finally I used backstitch for the legs and feet. I went on the stitch the white chicken in exactly the same way. It was hard to keep the chain stitch rows close enough together, especially when going round the corners. Finally I stitched the black chicken using variegated thread in the same way.
The last step was to add the background details. You will see that I did not put the sun in as I felt that it was busy enough. I left the egg until last as I was afraid that I wouldn't be able to do it smoothly. One tip I picked up was to backstitch around the outline of the egg and then satin stitch over the outline to make it neater and give it a slightly raised appearance. Saima recommended filling in large areas using Romanian Couching, which is economical with the thread. The lettering was stitched in small back stitches and the straw is seed stitch using 2 different colours of floss in the needle.
The final piece was backed onto an art canvas with a layer of thin fleece underneath and fixed on the back with a staple gun.
My nephew and his family loved the final piece and it now sits in pride of place on the bookshelf in their living room!


