Monday, December 28, 2020

3D Forms

This stitch workshop was led by 'assemblage artist Clarissa Clarenden. She works in 3D and she made an interesting comment that many artists come to textiles because you can get textiles to mimic many other mediums. She encouraged us to make random stuffed shapes, stitch them together to make a small abstract wall plaque.

We started by cutting out roundish or rectangularish chunks of fabric and sewing a gathering stitch around the edge. As we started to gather up the stitches we pushed fibre fill or toy stuffing in to make small, irregular stuffed shapes. We were encouraged not to think about the shape of the fabric too much - just hack it out very roughly and stitch the shape and stuff it very intuitively. 
I decided to approach this by selecting a colour palette of turquoise, browns and yellows mostly drawing on scraps of furnishing fabrics, which I haven't found much of a use for up to now.
You can see that I ended up making quite a few long pointed shapes as well as some more rounded ones and tiny balls. A lot of my fabric frayed quite badly but I left that visible and made a feature of it. You can vary the shapes in a number of ways:
  • Varying how tight you pull up the gathering thread - if you pull if very tightly you can can ripple or curl the shape
  • Stitching through the shape to make dimples, folds or other deforming marks
  • Adding stitching or other decoration on the surface, either before or after making the shape
  • Wrapping the shape with thread, yarn or wider strips of fabric
  • Enclosing objects, especially if you use sheer or lacy fabric

I experimented with adding some surface detail with metallic nail varnish to some of my shapes to emphasise some of the dimples. In addition, I rubbed on metallic wax colour on some areas of the shapes to pick up the surface texture and make the shape look more worn.

Another technique Clarissa showed us was knotting. She took a long length of fabric and knotted it extensively, with knots on top of knots to make new forms. I had a go at this with sari silk strips, fabric strips and knotting multiple threads together.

Finally I had to assemble all this together into something. This was harder to do than you would think as you had to stich it firmly through the various shapes from the back so that it would hold the shapes together as you had them in your hand. I eventually ended up with this conglomeration, which I called 'Reluctance' because I fought the process of making this all the way to the end! (Still looks like entrails to me!)


Paper Gloves (in praise of nurses)

This project was my response to a workshop set by Jennifer Collier, who is known for stitching lifelike objects out of vintage paper. She provided us with a template and invited us to create a vintage style or pair of ladies buttoned gloves. Her demonstration ones were beautiful, using pages from A Diary of a Country Lady, which she buys up from charity shops - see below. I remember that this book and the spin-off merchandise were popular gifts for your Mum or Granny when I was growing up!

Paper gloves by Jennifer Collier

This project seemed easy enough - choose some interesting paper, stitch round a front and back with running stitch before cutting out. Then add thumb and button fastening detail. There was the option to iron some wax onto the thumb piece to make it more translucent if necessary.

However, it just wasn't grabbing me - I couldn't think of a story to tell with the gloves, which seemed key to me. So I started doing some research online and found the following image - a string and nail artwork - which I found very striking. It make me think of a parent holding a child's hand or caring hands, although a friend said she thought it looked like a child had been snatched away in a sinister way!

I therefore decided to go with it and use a nursing theme. I found some current and archive images of nurses online and printed them out on white and blue paper. I haven't printed on coloured paper before but I thought it might help to unify the colours better. I also found a great image of union jacks and banners thanking the NHS during the pandemic from Oxford Street in London I think. I thought that the splashes of colour from the flags would also be  a great addition to the piece. 

One of the archive nursing images I was attracted to included 2 women of colour. It highlights the vital role that migrant workers have played and continue to play in staffing the NHS. One such nurse was my Aunt who came to the UK from Malawi to train as a nurse then a midwife, so this started to make the piece more personal, although I don't have a photo of her in her nurses uniform.

One good tip Jennifer gave was to trace your template onto a piece of acetate so that you can easily select the placement of images on your paper. I made a collage of the images I had found and played around with them so that the most important bits of the pictures and words were in view before cutting them out. It was quite a complicated set of pieces to fit together and cutting out the internal curves of the small hand was very tricky to do accurately. I stuck the pieces down with glue stick on a piece of card cut to the same template.
I then had to decide how to mount the shape. I tried the piece out on both white and blue backgrounds. The strong blue of the second image reminded me of 'PPE blue' that seemed to be everywhere on the news during the pandemic and seemed to set off the images nicely. 

Before fixing this down I wanted to add some stitching - this was a stich challenge after all! I got the idea of researching the types of stitches used for medical purposes:
Many of them seemed very similar to conventional embroidery stitches but of course they are all sewn and finished off from the front. I used a needle to pierce holes around each of the images in my piece and used all of the different types of suture, which was fun! I even included some staples.


To neaten the edges of the glove I went all around with a black felt tip. 

Finally to add a contemporary touch and give a nod to the rainbow symbolism that has become synonymous with the NHS during the pandemic, I created a rainbow friendship bracelet to go on the 'child's' wrist. To do this I chose the 7 colours of the rainbow in single strands of embroidery floss and made a kumihimo braid  - see my earlier blog post. I cut a tag out of embossing foil, pierced 2 holes in it with a large needle and stuck on an NHS logo. Then I threaded the tag onto the friendship string and fixed it across the gap, securing it with sticky tape.

I mounted the whole piece onto the background card with sponge sticky spacers used in card making, to give the whole piece a 3D element. Nothing like the original vintage glove project, but fun to research and make.


Sunday, December 27, 2020

Handmade Stitch Sketchbook

This was a wonderful project to make my very own sketchbook. It made me ridiculously happy making this book and to now use it. The workshop leader was Ali Ferguson, who says that she makes these sketchbooks at the start of each new textile project that she embarks on.

We first started by choosing 21 pieces of A4 paper for the pages inside. I used lots of old artwork from my City and Guilds course, scrap lining paper, brown paper and some craft papers. Each page was folded in half so that the finished book was A5 with 40 pages (the first and last page gets stuck to the inside covers). We had to stack the folded pages inside each other into 7 groups of 3 to make 7 'signatures'. 

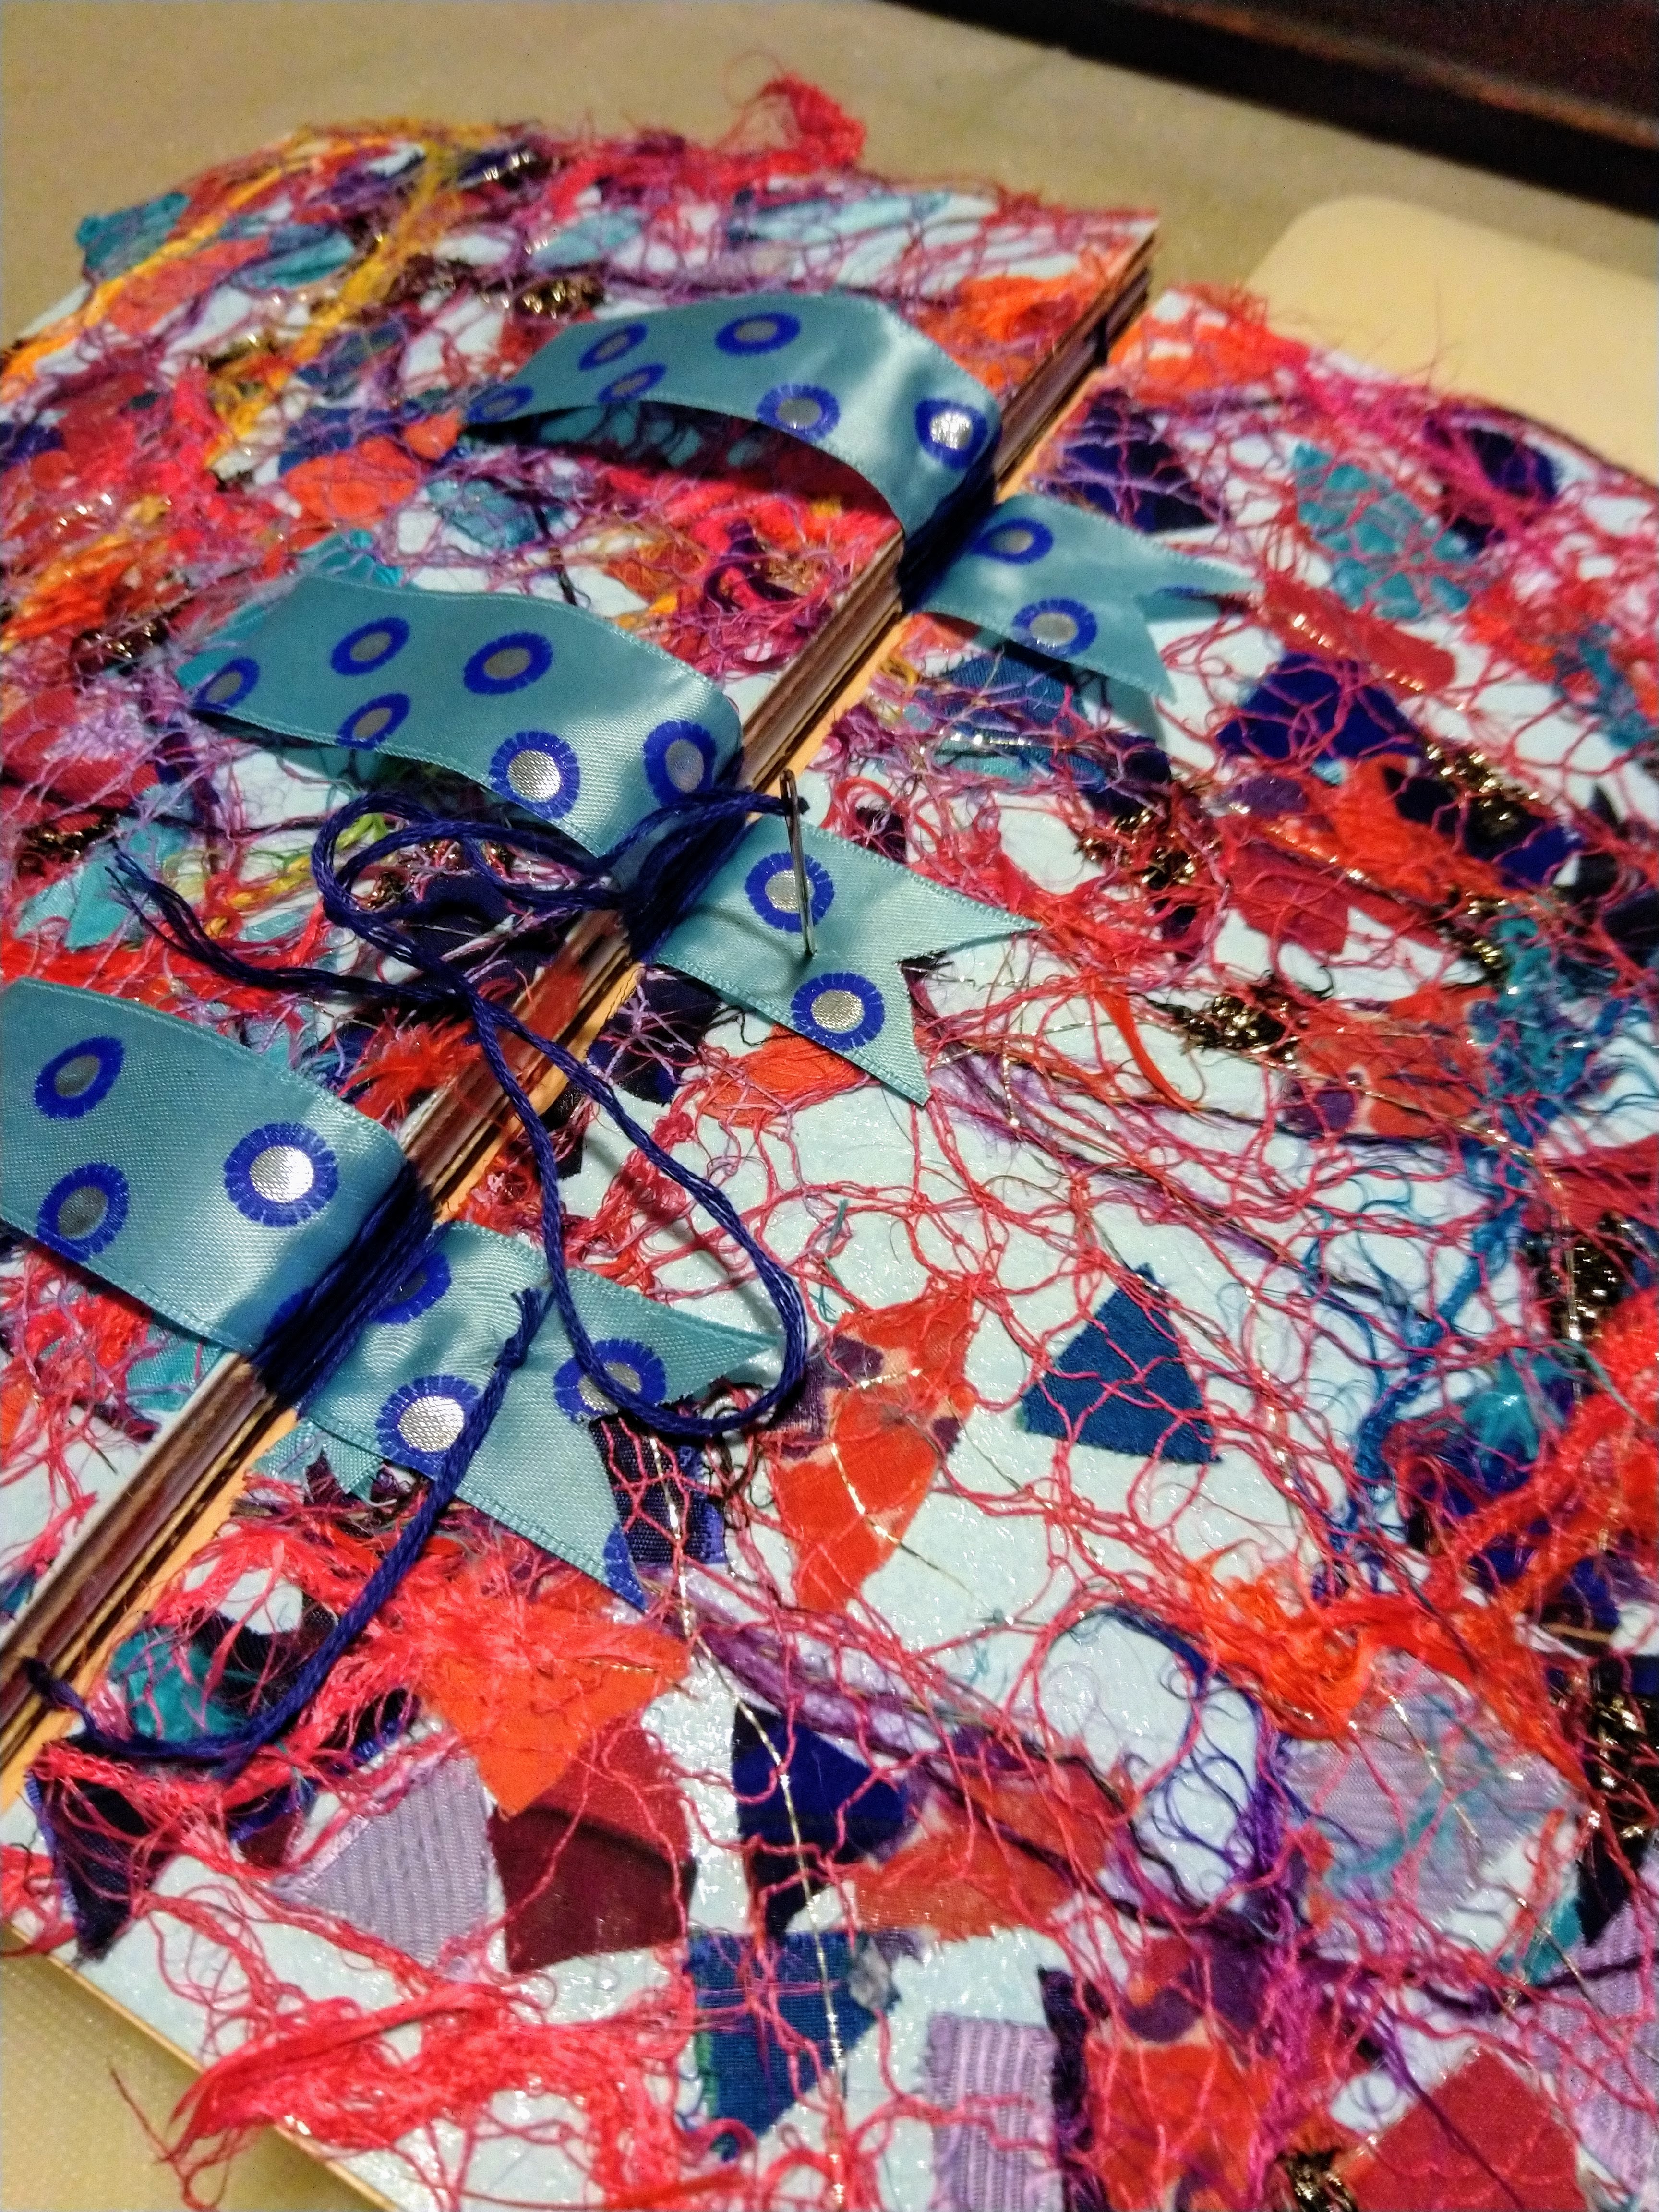
Next I had to decide what to use for the 3 fabric tabs that would hold the spine together, which also meant that I had to make a choice about the cover fabric. I settled on using a piece of 'machine lace', another City & Guilds sample - see my earlier blog post on how I made this. I chose to use some wide ribbon for my tabs. The significance of choosing the tabs was that it determined where to pierce holes for the stitching on the spine.


The technique for marking the holes was to take a strip of paper the height of the pages, fold in half and half again to get quarter points. Then the fabric tabs are going to lie equally over the 3 fold lines. In addition a hole is marked 2cm in from the top and bottom - 8 holes marked in total. I then used a thick needle to poke the marked holes in each of the signatures. Incidentally, in the above photo you can see that I included a pair of envelopes in the centre of this signature, an idea I got off the internet, held temporarily in place with masking tape.


Next was the stitching. I used embroidery floss approximately 8 times the height of the book. You start by stitching from the outside of the first signature, leaving a long starting tail, and make a running stich in and out of the pierced holes up the length of the spine, going over the ribbon tabs each time. At the top you come down the next signature in the same way, and then back up the third. At the top of the third signature, you loop the thread between the first and second signatures, called a 'kettle' stitch to link the spines together. You carry on in the same way for the rest of the signatures, adding a kettle stitch at the top and bottom of each spine until all 7 are attached. I found it very useful to use a bulldog clip to keep the pages in the signature aligned as I went. It was very important to keep the thread pulled tight throughout but without accidentally ripping the paper.

The ends of the thread were finished off by threading them back in the next hole along and then tying them off on the inside with a few knots.

The final stage was to attach the covers and secure the tabs. I cut the covers from thin greyboard and covered them in blue coloured paper before attaching the machine lace using bondaweb. I then glued down the first and last pages to the inside of the covers.  Next I cut a notch in the ends of the ribbon to stop it fraying before making a large stitch through the ribbon and cover, knotting it on the outside. 

Finally I chose 3 whacky buttons to finish off. The reason I didn't stitch the buttons at the same time as stitching the tabs to the cover was because I wasn't sure I would be able to get them lined up due to my buttons having a horizontal hole rather than vertical ones.
 

I was delighted with the result but there was more fun to come embellishing the inside pages with:
  • Deckle edge scissors
  • Sticky paper tape and ribbon
  • Scraps of decorated and printed paper
  • Stick on eyelets, borders, flowers etc
  • Hole punch
  • Felt tip pens


You can trim the edges of the pages which allows the page behind to show through. I am using the book to make notes of stitch techniques picked up along the way.
Ali Ferguson said that you can use any paper but black, brown Kraft paper and vellum are her favourites. You can also add in fabric pages, preferably using a stiffish fabric in the centre of a signature. It is also possible to add fabric or stich samples into paper pages but it is recommended to reinforce the page with an additional piece of fabric glued on with glue stich behind so that any stitching won't rip out.


Knitwear Bauble

This year my group of stitching friends decided to organise a secret tree decoration swap. We drew names using Drawnames.co.uk, which worked really well, and then had free rein to make whatever we wanted. I had enjoyed exploring using cut up charity shop knitwear in my Tree Bark Abstract so I had the idea of covering an existing tree bauble in knitwear and embellishing it.


First I found a free pattern on the internet for making a fabric sphere at www.annwoodhandmade.com - I was extremely lucky that the small size fitted the existing bauble exactly. I chose the 4 part sphere and cut 2 sections from the jumper ribbing and 2 from the body. 


I oversewed 2 of the panel together from the bottom, stopping 2cms from the top. I then added a third panel in the same way. On the fourth panel I initially stitched only half way up on both seams, put it onto the bauble and then carried up on the remaining seams in tandem. Finally I tidied up the top of the other seams until the bauble was tidily encased in the knitwear jacket.

Then I added the embellishment - a ribbon flower, a lace snowflake and numerous white and silver beads.


Finally I added a sparkly hanging thread!

My friend was really pleased with the bauble - here it is hanging on her tree.